This simple program converts a raw, flat file of 4-byte single-precision floating point numbers representing "phtons/pixel", such as the "floatimage.bin" files output by my nearBragg, nanoBragg, and nonBragg simulators, into an "SMV" format X-ray image. The "Super Marty View" or SMV format is one of the most widespread and long-lived format for X-ray images. It is used by Area Detector Systems Corporation (ADSC) and more recently by Rigaku. It is programmatically convenient because it is a "flat" file format, with the bytes stored uncompressed. It can be converted to other formats such as CBF by using CBFlib.
The noise model used by noisify is relatively simplistic, but still comprehensive. In general, noise is either proprotional to the signal, such as flicker noise, shutter jitter, or calibration errors, independent of the signal, such as read-out noise, or proportinal to the square root of the signal, which is photon-counting noise. This program implements all three, with inputs in real-world units. See the command-line options below.
Noisify will also implement a fiber-coupled-CCD-like point spread function using the formula derived by (Holton et al. 2010).
pre-compiled binaries: linux, OSX, Windows
there are no dependencies beyond the standard C math libraries shipped with essentailly all modern C compilers.
wget http://bl831.als.lbl.gov/~jamesh/bin_stuff/noisify.ccompile it
gcc -O -O -o noisify noisify.c -lmNow we need some floating-point values. Might as well use floatgen to make a ramp:
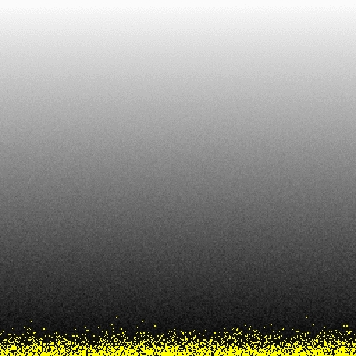
wget http://bl831.als.lbl.gov/~jamesh/bin_stuff/floatgen.c
gcc -o floatgen floatgen.c -lm
seq 0 65535 | ./floatgen >! ramp.bin
Now we run these pixel values through noisify. It will use some sensible defaults for detector geometry to put into the header (it does not affect the results), and guess at the x-y size of the detector:
./noisify -floatfile ramp.bin
noisify - add noise to pixels - James Holton 10-4-15
WARNING: guessing xy pixel dimensions.
importing 65536 pixel intensites: ramp.bin
  distance=0.1 detsize=0.0256x0.0256  pixel=0.0001 meters (256x256 pixels)
  Xbeam=0.0128 Ybeam=0.0128
  seed: -1455650997
  calibration noise seed: 123456789
  calibration_noise = 0 %
  input file scale = 1
  readout_noise = 0 ADU
  flicker_noise = 0 %
  quantum_gain = 1 ADU/photon
  adc_offset = 40 ADU

maximum value in input file: 65535 ( 65535 on photon scale)
writing intimage.img as 65536 2-byte integers
writing image.pgm as 1-byte integers
2147701149 photons on noise image (786 overloads)
writing noiseimage.img as 2-byte integers
mv noiseimage.img ramp.img
adxv ramp.img
You can see that although the "true" pixel values are ramping up linearly in the input file "ramp.bin", the "x" direction is moving fastest and the "y" direction is slower. There is also "fuzziness" to the image because noisify added Poissonian photon-counting noise.
To see what diffraction data look like, download and compile nanoBragg:
wget http://bl831.als.lbl.gov/~jamesh/nanoBragg/nanoBragg.c
gcc -O -O -o nanoBragg nanoBragg.c -lm
make an image with it:
awk 'BEGIN{for(h=-10;h<=10;++h)for(k=-10;k<=10;++k)for(l=-10;l<=10;++l) print h,k,l,-log(rand())}' >! random.hkl
./nanoBragg -hkl random.hkl -cell 20 20 20 90 90 90 -N 50 -misset 10 20 30
mv noiseimage.img nanoBragg.img
adxv nanoBragg.img

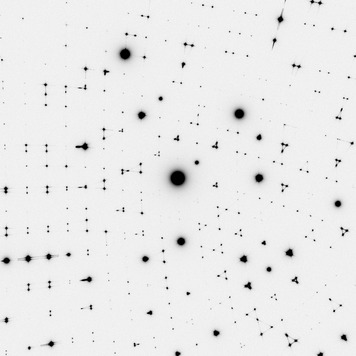
In this case, the default image is too faint to see much (left). If you zoom
in (right) some of the spots are apparent, but weaker features are
below the noise.
Since nanoBragg
runs can be slow, it may not be desirable to run it all again just to change
the overall scale. This is why nanoBragg writes out a "floatimage.bin"
flat file of 4-byte floats. That way, you can repeat the final scaling
and noise calculation step with this command:
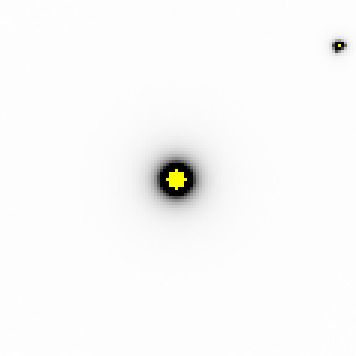
./noisify -floatfile floatimage.bin -header nanoBragg.img -scale 1000 -readnoise 3
mv noiseimage.img upscaled.img
adxv upscaled.img
Now you can see the weak inter-Bragg features (left) that were rendered by nanoBragg, but too hard to see in the original output. Some of the spots are very bright (right), but the tails of the normal point- spread function of a fiber-coupled CCD detector are not apparent. These can be turned on in noisify, however, with a simple switch: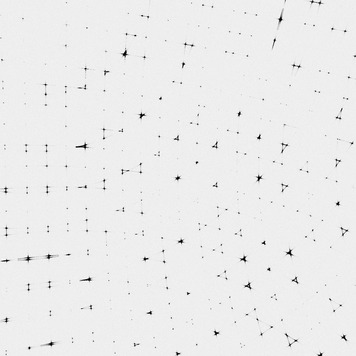

./noisify -floatfile floatimage.bin -header nanoBragg.img -scale 1000 -psf fiber -readnoise 3
mv noiseimage.img psfed.img
adxv psfed.img
Now the zoomed- out image has the familiar tails around the really bright spots you expect to find on a CCD. The PSF can also be made Gaussian.